Open the Trail Shop and choose the cash button
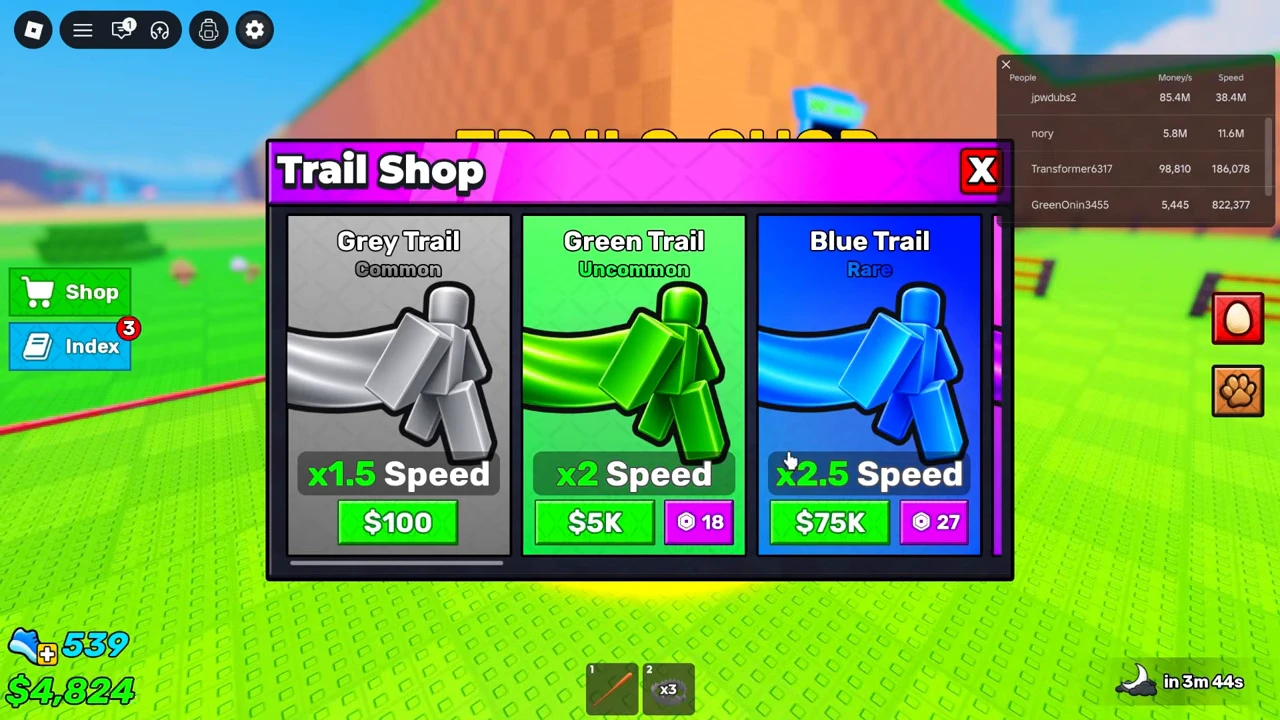
Walk into the yellow area under the TRAILS SHOP sign in the Safe Zone. The menu in the August 20 recording shows Grey, Green and Blue Trail cards. The green cash buttons and purple Robux buttons are separate purchase options.
The small table below reproduces the three directly visible cash offers and displayed Speed labels. They are dated menu observations, not a guarantee of unchanged shop prices today. The Grey Trail is the purchase followed through in this guide.
| Trail | Recorded cash offer | Displayed label |
|---|---|---|
| Grey | $100 | ×1.5 Speed |
| Green | $5K | ×2 Speed |
| Blue | $75K | ×2.5 Speed |
Verify the active state after buying
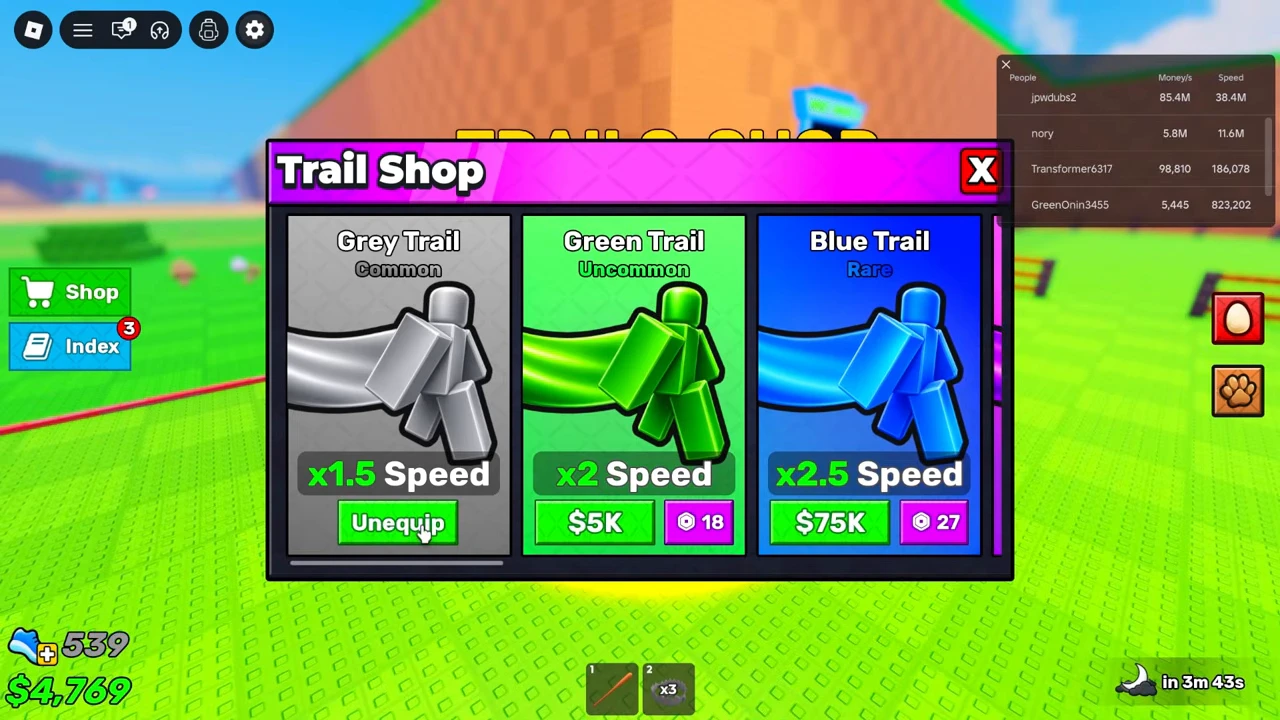
The Grey Trail button changes from $100 to Unequip after the purchase. In this recorded sequence, it is already active at that point; the footage does not establish a mandatory second Equip click between buying and this state.
If your current menu instead presents Equip after purchasing, use that control and check again. Unequip is the useful endpoint: pressing it would remove the currently active trail. A visible price on a different card is an unpurchased offer, not proof that both trails are active.
Return to training and check the displayed gain
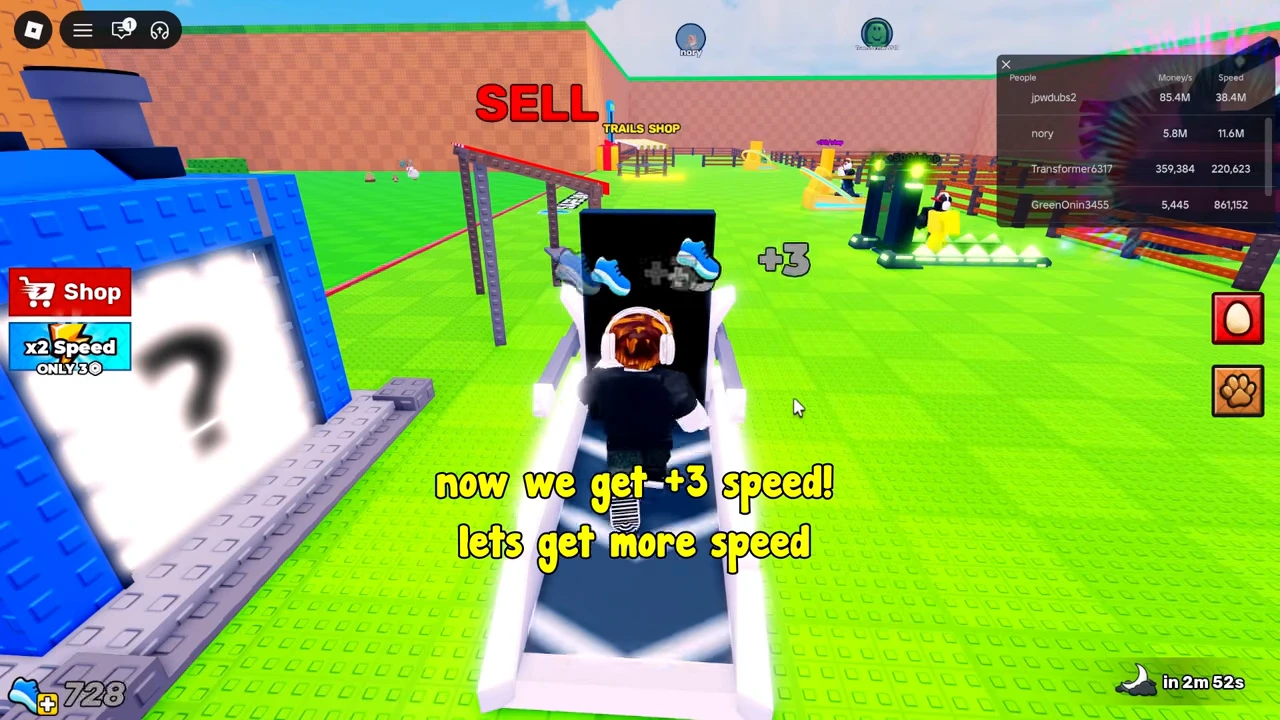
Before this purchase, the early treadmill shows +2 shoe-marked gain pop-ups. After the Grey Trail is active, the same early machine shows +3. This is the visible comparison the recording supports.
The ×1.5 label and the +2-to-+3 display are consistent with a larger training increment. They do not establish the game’s complete movement-speed formula, all rounding behavior, stacking rules, or an exact loaded-egg escape threshold. The video is edited, so the comparison also does not establish a per-minute training rate.
If the result is missing
Reopen the shop and check the trail’s state first. If it still has a price, the purchase has not reached the recorded active state. If it says Equip, activate it. If it says Unequip, return to the treadmill and check the shoe-marked gain rather than the cash total.
For the initial machine unlock, use the treadmill guide. For reaching a later biome, treat this as training preparation: the recorded trail purchase alone does not prove that every egg weight in the next zone can be carried out safely.
Compare a route before the next purchase
This is a suggested test plan for your own play, not a completed timing experiment from the edited footage. Use the same nest as the start and the game’s successful-return confirmation as the finish. Merely seeing the Safe Zone ahead is not completion.
- Write down the displayed Speed, active trail and visible boosts. Choose comparable eggs and record their shown weight; when a condition is unknown, mark the comparison limited.
- Run the route twice with that setup. Start timing at completed pickup and stop at the successful return. For a failed run, record where the egg was lost and what you actually saw; do not infer the cause from a fall alone.
- If the same turn or missed pickup causes the interruption, practise that section while keeping training unchanged. If carrying remains intact but your return is consistently pressured, try a bounded training change while keeping the route and equipment fixed.
- Repeat the same run after changing just that one factor. Compare completed returns and interruption points as well as elapsed time. Mixed egg weights or changed boosts cannot isolate the cause of improvement.